We’re in the process of migrating a long-term project from our in-house build environment (Jenkins on Windows) to Azure DevOps. This is the first in a series of posts documenting our process.
This post is all about setting up the automated build process. Firstly, some particulars of our project:
- Project is in the DevOps git repository. It was moved from bitbucket.
- Solution contains three unit test projects, an ASP.NET application, console application, several assembly projects, all targeting .NET v4.7.
- Code is found under src/
- Unit Tests are using NUnit. This is important to know for later on in this post.
- Our Project tasks are currently controlled by rake tasks developed over the years (e.g. build, run unit tests, run selenium tests, create release artifacts). These will change depending on what Azure DevOps supports. Ideally we’d like to use as much of standard Azure DevOps tasks as possible.
Setting up Build Pipeline
I’m assuming you’ve created a project in Azure DevOps. Let’s get started by creating a Pipline file.
- In the Project area at https://{organisation}.visualstudio.com/{projectname}, click on “Pipelines”.
- Then select “New pipeline”.
- Now, select where you code is being retrieved from. We’re using “Azure Repos Git”.
- Now, select which repository in Azure DevOps (You may have multiple repositories in your Azure DevOps project).
- Configure your pipeline now. For this project we’re selecting “ASP.NET”.
-
We’re presented with our azure-pipelines.yml file editor. This file includes tasks to build the project and run all tests in the solution.
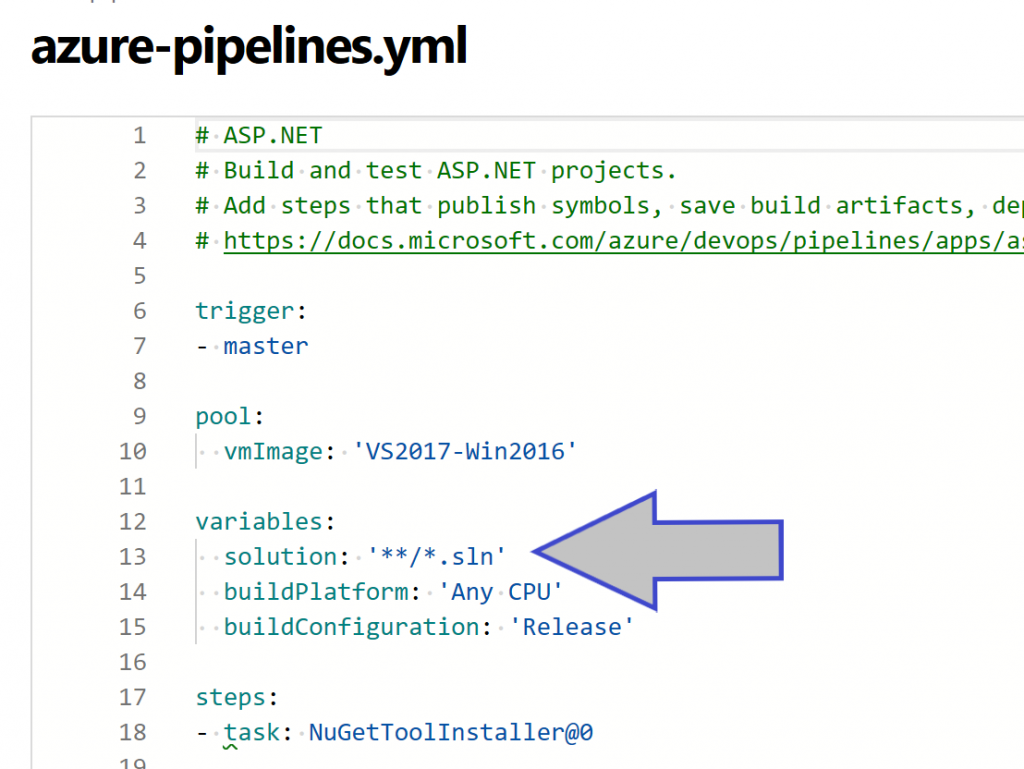
- As we only have one solution for this project, I’m going to edit the “solution” property in the global variables to ‘src/TestProject.sln’ from ‘**/*.sln’. I like to be explicit here as sometimes we have different solutions for the same project. e.g. We might have a solution just to develop on the back-end in Visual Studio.
- Now select “Save and run”. Azure will prompt you whether you want to commit to master or commit to a new branch. I’ll select commit to master.
- Once Saved and committed, your build should now run.
- And now we wait for Azure to run the pipeline….
-
And we’re done! However we have an issue with the VSTest task.
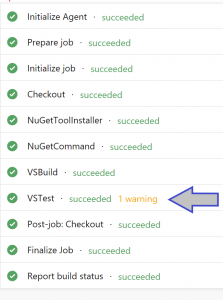
Fixing VSTest Task
- In VSTest task, we get a warning stating:
##[warning]Invalid results file. Make sure the result format of the file 'd:\a\1\s\TestResults\VssAdministrator_fv-az150_2019-04-02_11_26_15.trx' matches 'VSTest' test results format.
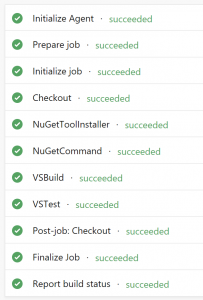
Additionally in the console output of the VSTest task, it indicates that it couldn’t find any tests. - After digging around, it turns out you need to have the nuget package “NUnit3TestAdapter” installed in your tests project. This allows the vstest.console app to find the tests in your tests project. We had never come across that previously as our Visual Studio installs always had the NUnit 3 Test Adapter extension installed and we had always controlled our automated tests via rake tasks using NUnit Console runner.
-
After installing that, and committing the changes, we get all green!
So after all that, we now have the following:
- Continuous building of our project
- Continuous running of unit tests
What we need to do in the future is:
- Deploy our project to a Windows Server
- Run our end-to-end tests
- Run integration tests
- Generate a release artifact for a UAT and Production environment.